Lab
A cradle for dental study models
Print a bench cradle that holds a plaster dental study model for photos and practice marking. Not a clinical device and not for patients.
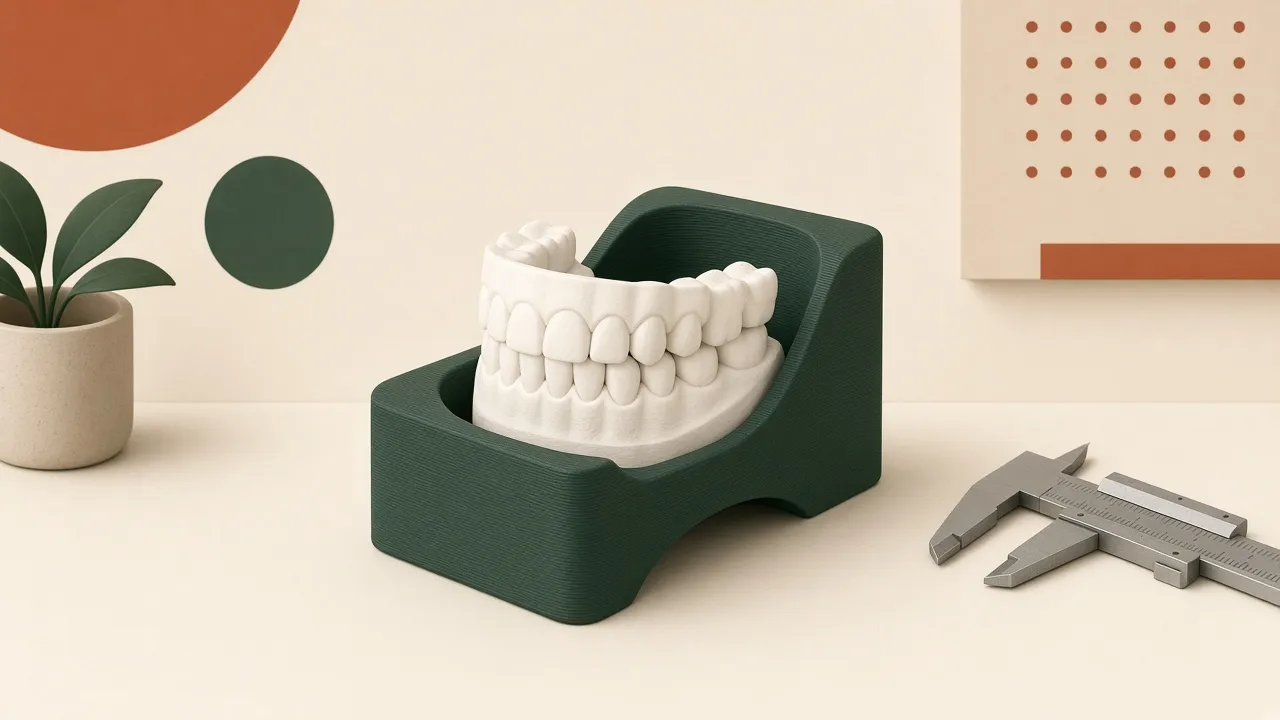
Not a medical device. This cradle holds a plaster or resin study model on a bench so you can photograph it or practice marking. It does not go in a mouth. It does not touch a patient. It is not an aligner, a surgical guide, or an articulator.
Dental students and lab hobbyists end up with models that rock. The base is hand-trimmed, the bench is cluttered, and every photo is taken from a slightly different angle. A generated “dental jig” prompt will happily invent a clinical instrument. The useful object is duller: a nest that matches one model base and sits still.
The wider workflow is covered in what vibe manufacturing is. Here the draft is a cradle, and the review step includes throwing the file away if it starts to look like a device.
The problem
A study model is a record of teeth, poured or printed, with a base that was never meant to be a precision datum. You want it:
- Seated the same way every time you take a photo.
- Held so both hands can mark a practice line.
- Kept off its side so the teeth are not the thing touching the bench.
You do not want a generated articulator, a facebow, or anything that claims to transfer a bite. Those tools exist, they have a procedure, and a chat CAD file is not how you get one.
If the model is a patient’s record in a real clinic, follow that clinic’s rules for where models live and what you are allowed to attach to them. This article assumes a practice model you are free to handle on a bench.
Workflow
1. Measure
Measure the model you have, not a textbook base.
- Length and width of the base at the bottom, and again 10 mm up, because trimmed bases taper.
- Height from the bench to the highest cusp, so the cradle walls stay clear of the teeth.
- Any indexing notch already on the base. If you ignore it, your cradle will fight it.
- Whether you want the model to lift straight out or slide in from the front.
Use calipers. Write millimeters. Photograph the model in the calipers so a later prompt does not “correct” a lopsided base into a rectangle. The lopsidedness is the point.
2. Prompt for a CAD file
Ask for a nest with clearance and a three-point seat. Three points do not rock. A full rectangular pocket often does.
Model a bench cradle for a plaster study model.
Base of the model is 62 mm by 70 mm, slightly irregular.
Inside pocket 66 mm by 74 mm, walls 12 mm high, so the teeth stay clear.
Seat the model on three pads, 2 mm high, not on a continuous floor.
Add a finger notch on the front wall. No articulator hinge, no bite fork,
no claim that this is a medical device.
Export STL in millimeters.
Put your numbers in. Keep the negative constraints. Models love to add a hinge because the word “dental” was in the prompt.
3. Prototype
Print one cradle. Set the model in it. Try to rock it with a finger on the base, not on the teeth. If it rocks, do not sand the teeth and do not sand the plaster record to fit the plastic. Change the pads or the clearance and print again. A study model is the thing you are protecting.
Take the photo you actually wanted. If the camera angle is still awkward, add a small foot or a 10-degree wedge in the next file. That is a better use of a reprint than decorating the walls.
4. Review
Check that no wall touches a tooth. Check the notch. Confirm the STL units in the slicer: a cradle that arrives ten times too big is the classic millimeter-versus-inch miss, and it is the same miss that ruins a dishwasher rack clip.
Look at the file name and the prompt you saved. If either one says “surgical,” “patient,” or “guide,” delete the file. The review step is allowed to end the project.
5. Send it to a fabricator
A printer on the bench is enough. A print farm is fine if you do not have one. Tell them the material is for a desk, not an autoclave, unless you have separately confirmed a process this article does not cover. Do not send plaster dust in the same box as a finished print and expect either one to stay clean. Bag the model. Bag the cradle.
Tools and services
- Calipers and the actual study model.
- A CAD draft that exports STL. FreeCAD, a mesh tool, or a text-to-CAD assistant are all enough if you open the file.
- A printer or a print farm. PLA is a reasonable desk material for a cradle that stays indoors.
- A marker and a camera. Those are the tools the cradle is serving.
No dental lab is required for a practice model on your own bench. If a lab is producing models for a clinic, their workflow and their regulations are the instructions, not this page.
Cost and time
Estimate, not a quote. One small cradle is a few dollars of filament if you print it yourself. A farm may charge more for a single piece because of handling and shipping. A planning range of about $5–$30 before shipping is only there so you know this is a small job. It is not a lab fee and it is not a material certification.
Estimate, not a schedule. Measuring, prompting, and a first print can be an evening if the printer is free. A rocking fit means a second print. Neither number includes learning to trim plaster.
Pitfalls
- Letting the prompt grow a hinge, a facebow, or a “guide” because the word dental was nearby.
- Forcing a patient’s model into a tight pocket and chipping a tooth off the cast.
- Assuming a rectangular pocket will seat a hand-trimmed base.
- Sanding the plaster to fit the plastic.
- Printing in a material you then try to autoclave because a forum said it might be fine. This cradle does not need sterilization to sit on a bench. If your setting requires sterilization, this design is not that answer.
- Mixing units, then printing a cradle the size of a loaf.
- Using it as a wall storage jig substitute and dropping a model off a cleat. Keep the cast on the bench.
FAQ
Can this cradle be used on a patient?
No. It is a bench fixture for a plaster or resin study model. It is not a medical device, not an impression tray, and not something that goes in a mouth or on a person.
Will it replace an articulator?
No. An articulator relates two arches with a specific hinge and mounting. This cradle only stops one model from rocking on a bench while you photograph it or mark it for practice. If you need an articulator, use an articulator.
What if the model rocks in the cradle?
The base of a poured model is rarely square. Add clearance, a three-point seat, or a thin compressible pad. Do not keep reprinting a perfect rectangle and hoping the plaster becomes square.
Is the cost range a lab fee?
No. It is a rough estimate for plastic and a small print. It is not a clinical fee, a materials certification, or a quote from a dental lab.