Small business
Print test coupons, not the whole product enclosure
Dan Peguine iterates a Button Box enclosure with Claude, Astra and a Bambu Lab X1 Carbon by printing small test coupons instead of the whole case.
Source: Dan Peguine (@danpeguine) on X, November 6, 2026. This is an independent summary; the creator, Anthropic, OpenAI and Bambu Lab have not reviewed or endorsed it. We are not reproducing the photos from the post; see the original post for them.
Dan Peguine is building a product called Button Box and is now working on its enclosure. He says he has “zero experience with industrial design or building physical products.” His post lays out how he still iterates quickly: AI models do the design, a desktop printer makes the parts, and he never prints the whole box just to test one detail. It is one of the clearest write-ups so far of vibe manufacturing used for real product development rather than a one-off part.
His setup
From the post:
- Printer: Bambu Lab X1 Carbon, printing PLA.
- Orchestrator: Claude Opus 5.5 (medium). He calls it the orchestrator for the whole business: it has all his context, and the two of them iterate on the box together.
- CAD: Opus hands the actual CAD design to Astra.
- Sending to print: in his words, “coded sol actually works with bambu studio to send to print.”
The parts he mentions fitting inside the box are a PCB, screw posts, an NFC reader and a speaker. He does not publish the CAD files or say what Button Box costs. Those are the kind of bought parts a printed enclosure usually has to fit; electronics and hardware that go with 3D-printed and laser-cut parts collects them in one list.
Trick 1: print coupons, not the whole enclosure
He prints only the specific feature under test, which he calls a coupon. Every part that goes in the box gets measured with calipers, so the AI knows the exact dimensions and can position it.
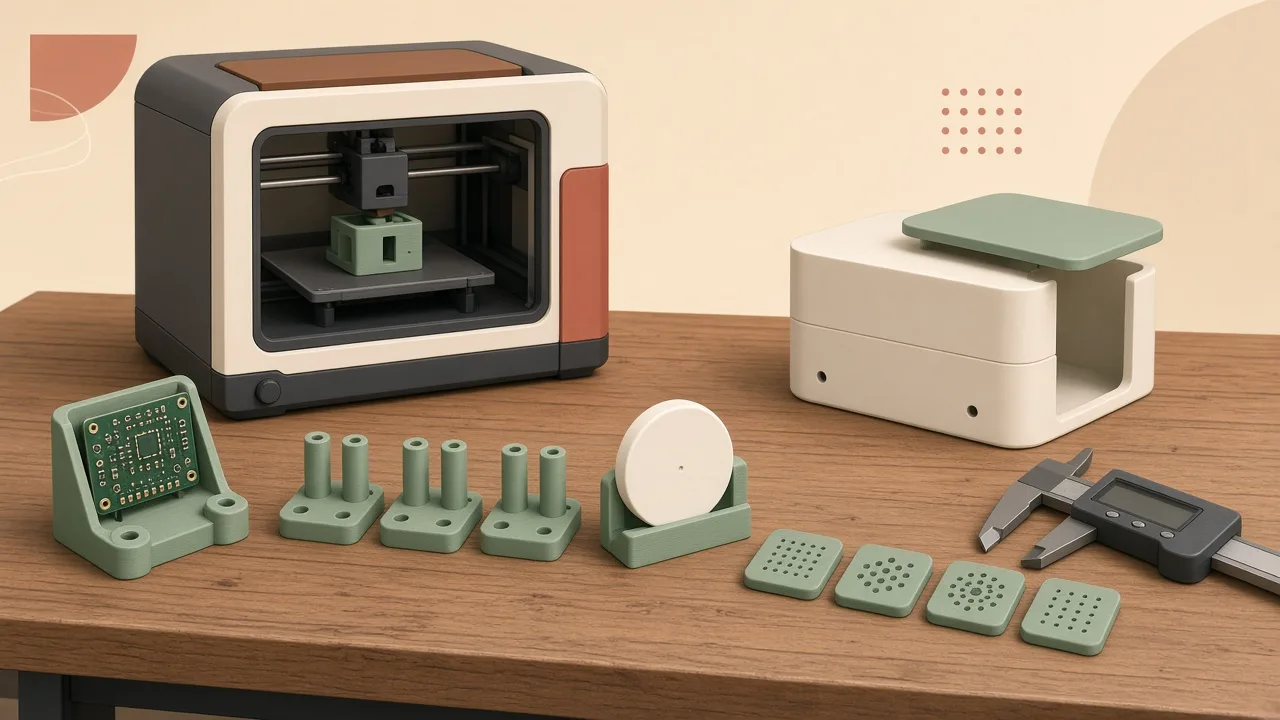
His example: he wants the PCB held inside the box, so he prints a coupon that is only the PCB holder. Claude proposes the experiments, so he may print three versions of the same part and compare them. He does the same for screw posts and for the NFC reader mount.
The appeal is simple: a small coupon is quick and cheap to print, so a failed fit costs little, and several variants can print in one go.
Trick 2: coupons for looks, too
Coupons are not only for fit. He uses them for creative choices like the speaker grille. Because Claude has the product philosophy and business context, it can propose many variations. He also asked it to look at how kids’ audio players such as Yoto and Toniebox do their grilles. They learned that most use small dots, and that Toniebox arranges its dots in a cat shape. So he asked for four grille variations, printed small versions as coupons, and picked the one he liked.
What limits the loop
He says the limiting factor is how fast the printer prints, which makes him want a few more printers. And he points out that the gains compound: he can change the bill of materials and quickly redesign the enclosure around it.
In a separate reply he says he also used Astra to make his own PCB, but that @edsammy said it was poor, and that he was going to try Backplane next. Treat AI-designed boards as drafts that need an experienced review; see our beginner PCB guide.
How to run a coupon loop yourself
These steps are our general advice, based on his method. They are not his exact prompts or files.
1. Measure everything that goes in the box
Board outline and hole positions, connector heights, reader and speaker diameters, screw sizes. Write them in millimeters and give them to the AI as named values.
2. Ask for one feature as a separate small part
From the enclosure model, make a test coupon that contains only the
PCB holder: the board pocket, its two standoffs and 3 mm of floor
around it. Make three variants with 0.2, 0.3 and 0.4 mm clearance
around the board, and label each with a raised number on the floor.
The clearances above are example values. Use your own measurements.
3. Print the variants together
Put all coupons on one plate. Labels on the parts save confusion later.
4. Test, then report back in numbers
Tell the AI which variant fit, and how the others failed (“too tight on the long edge by about 0.2 mm”). One clear change per round works better than a list.
5. Merge the winner into the full enclosure
Only print the full case once each critical feature has passed as a coupon. For more fit tips, see vibe manufacturing tips for a first print that fits and why AI-generated 3D prints fail.
Cost and time
Estimate, not a quote. He gives no costs or print times. A coupon typically uses a few grams of PLA, so testing three variants costs cents in filament. The real saving is printer time: small coupons usually take minutes, while a full enclosure can take hours.
Pitfalls
- Coupons don’t show everything. Warping, lid fit and how the whole box feels in the hand only show up on a full print. Do at least one full print before you call it done.
- Keep the CAD in one place. If the orchestrating AI and the CAD model drift apart, a coupon can pass while the full model still has the old dimension. Re-check the full model after each merge.
- Products for children. Button Box is compared with kids’ players. Toys sold in the EU must meet toy safety rules, and a hobby PLA print does not prove a product is safe or ready for sale.
- Electronics need review. An AI-drawn PCB still needs checking by someone who knows boards.
Tools and services
- Claude Opus 5.5, Astra and Sol, as named by the creator.
- Bambu Studio and a Bambu Lab X1 Carbon printer.
- Digital calipers.
Related use cases
FAQ
What is a test coupon in 3D printing?
A small print of just one feature of a bigger part, such as a PCB holder, a screw post or a grille pattern. You print it to check fit or looks without printing the whole object. Dan Peguine uses the word for exactly this in his post.
Which AI tools does Dan Peguine use?
He writes that Claude Opus 5.5 (medium) is his orchestrator with all the business context, that it hands the actual CAD design to Astra, and, in his words, that "coded sol actually works with bambu studio to send to print."
Which printer does he use?
A Bambu Lab X1 Carbon with PLA, according to his post. Any FDM printer can print coupons; the method does not depend on a brand.
Why not just print the whole enclosure each time?
A full enclosure takes much longer and uses more filament. Printing only the feature you are testing lets you try several variants at once, which is how he tests three versions of one part or four grille patterns.
Did AI also design his circuit board?
In a reply he says he used Astra to make his own PCB, but that @edsammy said it was poor, and that he was going to try Backplane next. This article covers the enclosure workflow, not the board.
Is this article endorsed by Dan Peguine, Anthropic, OpenAI or Bambu Lab?
No. This is an independent write-up based on his public post. None of them has reviewed or endorsed it.